


How to Tan a Rattlesnake Skin Safely
Learning how to tan a rattlesnake skin begins before the hide enters a tanning solution. You need to confirm that the skin was obtained legally, eliminate any risk from the snake’s head, remove every trace of tissue, and choose a preservation method that matches what you plan to make.
For a flexible hide that may be used in a sheath, hatband, inlay, or other craft, I recommend a commercial tanning product made specifically for reptiles. Salt, borax, and alcohol-glycerin treatments can preserve a skin, but they do not all produce the same durable, washable leather as a true tanning system. This guide explains the difference and walks you through the safer process from a legally obtained, already removed skin.
Safety note: Never pick up, skin, or work near the head of a rattlesnake, even if the animal appears dead. Poison Control warns that a dead snake can still envenomate, so an intact carcass should be handled only by a trained wildlife professional or experienced taxidermist. Call emergency services immediately after any suspected venomous-snake bite.
Before You Start: Check the Law and the Hide
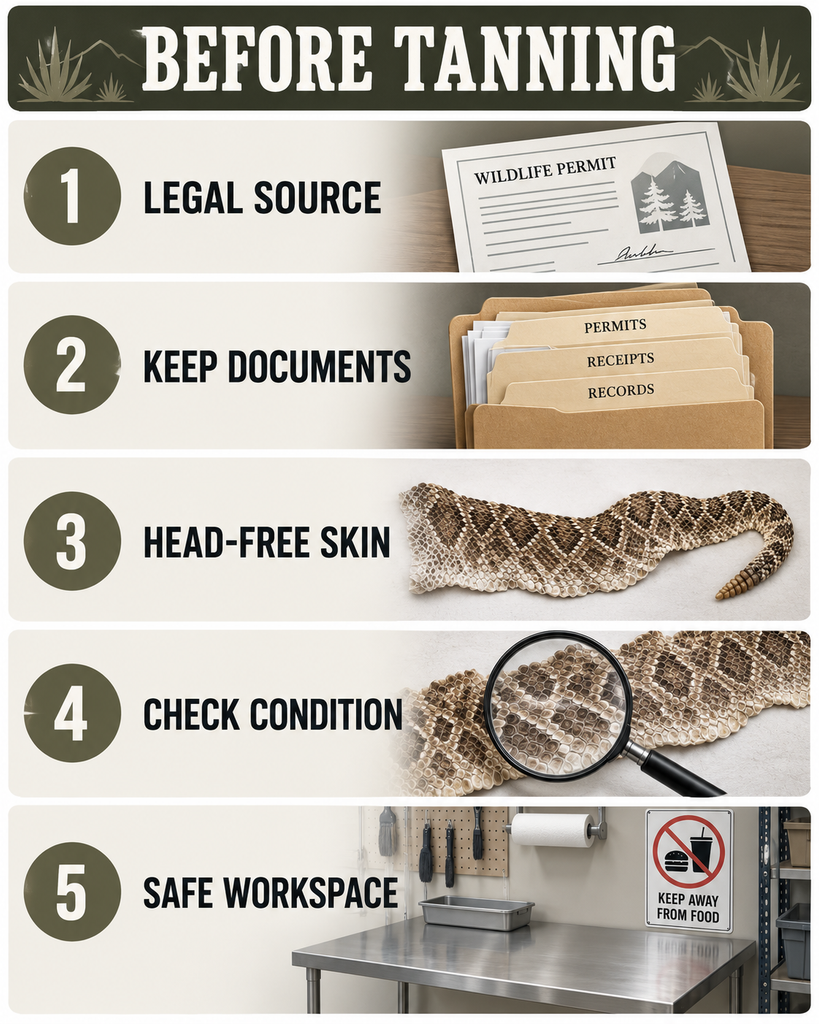
Wildlife rules can govern taking, possessing, transporting, selling, or keeping rattlesnakes and their parts. They vary by species, location, season, collection method, and intended use. A skin that came from private property is not automatically legal, and a road-killed animal may still be regulated.
Check your state wildlife agency’s current rules before accepting or working on a hide, and retain any license, receipt, tag, or transfer record. For example, Pennsylvania requires specific permits, limits, and possession documentation for timber rattlesnakes, while Oklahoma publishes separate rattlesnake seasons, license requirements, and event-permit rules. These examples show why a general online answer cannot replace the regulations where the animal was taken.
You should also reject a skin that has a sour or rotten odor, green or black tissue, widespread slime, or extensive scale loss. Tanning stabilizes a sound hide; it cannot reliably reverse advanced decay. When the source or condition is doubtful, professional tanning is the better choice.
What You Need
Set up in a well-ventilated workshop or covered outdoor area that children and pets cannot enter. Reptiles can carry Salmonella, and the CDC recommends washing hands and keeping reptile-related equipment away from food-preparation areas. Use dedicated tools rather than kitchen knives, bowls, or cutting boards.
Gather the following supplies:
- A legally obtained, head-free rattlesnake skin
- Disposable nitrile gloves and splash-resistant eye protection
- A smooth fleshing board or plastic work surface
- A dull-edged scraper, spoon, or purpose-made fleshing tool
- Fine, non-iodized salt for temporary curing, if needed
- A reptile-specific tanning kit or tanning solution
- Nonmetal containers reserved for tanning
- Measuring tools that will never return to food use
- Clean water at the temperature specified by the product
- Absorbent paper or clean disposable cloths
- A flat board, plastic mesh, or other drying surface
- Stainless-steel pins or clips if the chosen method calls for them
- A manufacturer-recommended tanning oil or conditioner
Do not improvise chemical combinations. Tanning products can differ in pH, concentration, soak time, and required preparation, so the label for one brand should not be combined with directions for another. Wear the protective equipment named on the product label and review its safety data sheet before opening it.
Choose the Right Tanning or Preservation Method
The word “tan” is often used loosely online. In practice, curing, preserving, and tanning have different goals. Choosing the method by the finished use prevents disappointment later.
| Method | What it does | Best use | Main limitation |
|---|---|---|---|
| Reptile-specific tanning kit | Chemically stabilizes the hide according to a complete system | Craft leather, inlays, hatbands, and flexible display skins | Directions vary by product and must be followed exactly |
| Salt or borax cure | Draws moisture from a raw skin and slows bacterial damage | Short-term storage or a stiff display | Not a complete tan; the skin may remain brittle or react badly to moisture |
| Alcohol and glycerin | Dehydrates while leaving a lubricating humectant in the skin | Decorative display pieces | Commonly called tanning, but it is better treated as preservation and can remain oily or less durable |
| Professional reptile tannery | Uses controlled chemistry and finishing equipment | Valuable, rare, damaged, or project-critical hides | Costs more and requires shipping or local access |
If the hide will be folded, stitched, glued into a working object, or expected to last for years, use a reptile tanning kit or a professional tannery. One detail I would not overlook is compatibility: some leather adhesives and clear finishes do not bond well to a glycerin-treated surface.
Can You Tan Snake Skin Naturally?
People searching for how to tan snake skin naturally often mean without a commercial chemical kit. Salt, borax, oils, smoke, and plant tannins are traditional preservation materials, but a small scaled hide is easy to over-dry, discolor, or damage while experimenting. Salt and borax mainly cure rather than tan, while vegetable tanning is a controlled process that is harder to perform evenly on delicate rattlesnake skin.
For a valuable hide, “natural” does not automatically mean safer or more effective. A purpose-made kit with complete instructions is the most predictable beginner option. If avoiding commercial agents is essential, test the chosen method on a small legally sourced scrap rather than risking the entire skin.

How to Tan a Rattlesnake Skin Step by Step
The following workflow starts with a fully removed, head-free skin and uses a reptile-specific tanning system. Because formulas differ, the manufacturer’s quantities, pH targets, temperatures, and timing always take priority over general instructions. For reference, one commercial process directs a roughly 14- to 16-hour tanning bath, while another uses a topical treatment for 12 to 24 hours; that difference is exactly why recipes should not be mixed.
1. Inspect and Stabilize the Skin
Begin as soon as possible after the skin has been safely removed. If you cannot work immediately, lay it flat or roll it loosely without sharp folds, seal it in two clearly labeled bags, and freeze it in a dedicated non-food freezer. Refrigeration only slows spoilage for a short period and is not a substitute for prompt curing or freezing.
Thaw a frozen skin slowly in a covered container in a refrigerator reserved for non-food work. Do not use hot water, a heater, or direct sun, because fast warming encourages bacterial growth and can loosen the outer scale layer.
2. Clean the Work Area and Put on Protection
Cover the bench with a disposable or washable barrier. Put on gloves and eye protection, keep open cuts covered, and have a lidded waste container nearby. Do not eat, drink, smoke, or touch your face while working.
After handling the hide, wash your hands with soap and water even if you wore gloves. Clean reusable tools with a suitable disinfectant, following the disinfectant label’s contact time, and keep all hide-processing equipment permanently separate from household food utensils.
3. Flesh the Hide Thoroughly
Lay the skin scale-side down on a smooth surface. Starting near the center, use a dull scraper at a shallow angle to push away fat, membrane, and muscle without cutting through the thin skin. Work in short, controlled strokes and support the area with your free hand.
The flesh side should look clean and even before tanning. Any tissue left behind can block penetration, trap bacteria, and create dark, stiff, or foul-smelling patches. Around the narrow tail and edges, reduce pressure rather than trying to remove everything in one pass.

4. Cure With Salt Only if the Process Requires It
If the hide must wait before tanning, or the kit specifically begins with a salt cure, place it flesh-side up and cover every part with fine non-iodized salt. Salt draws out moisture, so replace wet, clumped salt with fresh dry salt as needed. Keep the skin cool, dry, shaded, and protected from insects.
Do not assume that more curing is always better. An over-dried skin can be difficult to rehydrate without scale damage, and some reptile systems are designed for fresh or frozen skins. Follow the kit’s preparation instructions instead of adding an unlisted borax or salt stage.
5. Rehydrate or Wash as Directed
A salt-cured skin usually needs controlled rehydration before it can accept tanning agents evenly. Mix only the solution named by the manufacturer, using the stated temperature and duration. Keep the skin submerged without packing it tightly into the container.
Stop when the skin is evenly relaxed and flexible, not swollen or slippery. Prolonged soaking can encourage bacterial activity and may contribute to scale slippage. Drain it over the work container and blot gently rather than twisting or wringing it.
6. Apply the Reptile Tanning System
Measure the product and water accurately, and use a container made from the material recommended by the manufacturer. Add ingredients in the stated order, then immerse or coat the skin exactly as the label directs. Move a submerged skin gently from time to time so folded areas do not block contact with the solution.
Do not extend the soak simply because the hide “looks unfinished.” Tanning chemistry continues within the skin, and excessive exposure can affect color, flexibility, or scale adhesion. A commercial reptile-tanning guide illustrates this label-specific approach by giving a defined bath time and periodic gentle movement rather than an indefinite soak.
7. Drain, Oil, and Dry Flat
Remove the skin when the labeled processing time is complete. Rinse or neutralize only if the instructions require it, then blot away surface liquid. Apply the recommended oil or conditioner in a thin, even coat to the flesh side, keeping excess material off the scales unless the product says otherwise.
Arrange the hide straight on a clean board or mesh with the scale side up. Smooth it gently to its natural width without stretching the diamond pattern out of shape. Pin or clip only if the instructions call for restraint, placing fasteners along the outer margin rather than through the visible center.
8. Work the Skin as It Dries
A hide intended for craft use usually needs gentle working while it changes from damp to nearly dry. Flex it across a smooth rounded edge, roll it loosely in different directions, or massage the flesh side by hand. The goal is to keep fibers from drying together into a stiff sheet, not to pull off scales.
Stop if the scale layer starts lifting or the skin develops tears. Let the hide finish drying in moving air away from direct sun, heaters, flames, and high humidity. Depending on the method and conditions, final drying may take a day or several days.

Alcohol and Glycerin: A Display-Preservation Option
The common home recipe uses equal parts glycerin and rubbing alcohol. The alcohol helps displace water and inhibit microbial growth, while glycerin helps the finished skin remain flexible. Some guides immerse the skin, while others apply fresh solution repeatedly; either approach should begin with a thoroughly fleshed skin.
Treat this method as decorative preservation rather than guaranteed leather tanning. It may work for a framed skin or protected display, but the surface can remain oily, attract dust, or bond poorly with adhesive. It is a less dependable choice for an item that will bend, rub against clothing, get wet, or carry structural stress.
Rubbing alcohol introduces a serious fire risk. The NIOSH chemical guide identifies isopropyl alcohol as a flammable liquid, so work with ventilation and keep the solution away from flames, sparks, heaters, pilot lights, smoking, and hot tools. Store it in its compatible, labeled container, never in a food or drink bottle, and follow local household hazardous-waste rules for disposal.
How Long Does Tanning Rattlesnake Skin Take?
Hands-on work may take one to several hours, but the complete project usually spans several days. The exact timeline depends on whether the skin is fresh, frozen, or salt-cured; how carefully it was fleshed; the tanning product; and local temperature and humidity.
| Stage | Typical planning range | What determines completion |
|---|---|---|
| Inspection and fleshing | 30 minutes to 2 hours | Size, condition, and remaining tissue |
| Salt curing, if required | About 1 to several days | Moisture level and kit directions |
| Rehydration | Product-specific | Skin becomes evenly relaxed without turning slippery |
| Tanning treatment | Often 12 to 24 hours | Manufacturer’s formula and application method |
| Oiling, working, and drying | 1 to several days | Flexibility, airflow, and humidity |
These are planning ranges, not replacement instructions for a product. Trying to shorten the job with high heat is one of the quickest ways to create a curled, brittle hide.
Common Problems and How to Fix Them
Good results depend more on preparation and control than on aggressive scraping or longer soaking. Use the following symptoms to decide whether a hide can be adjusted or should be discarded.
| Problem | Likely cause | What to do |
|---|---|---|
| Sour odor, slime, or spreading discoloration | Bacterial spoilage | Isolate the skin and do not use it for a wearable or frequently handled item; consult a professional about disposal |
| Hard or board-like hide | Incomplete oiling, no working during drying, or simple salt curing | Recondition only as allowed by the tanning system, then work gently while it dries again |
| Greasy or sticky surface | Too much oil or glycerin | Blot the flesh side, allow more ventilated drying time, and avoid adding a finish until the surface stabilizes |
| Curled edges | Uneven drying or no flat support | If the method permits, lightly relax the skin and dry it flat under gentle, even restraint |
| Dark stiff patches | Tissue remained during fleshing or tanning penetration was uneven | Do not scrape aggressively after finishing; seek professional help if the piece is valuable |
| Loose or lifting scale layer | Decay, prolonged soaking, excess heat, or rough handling | Stop working the area; widespread slippage is usually not reversible |
Do not cover a bad smell with oil, lacquer, or fragrance. Odor is often a warning that biological material remains or decay has begun. A skin with active deterioration should not be kept where people, children, or pets will handle it.

Finishing, Storage, and Craft Use
Once completely dry, the skin should feel clean, flexible for its intended use, and free of sour odor or tackiness. Avoid heavy varnish unless you know it is compatible with the tanning system and the planned adhesive. A rigid clear coat may crack when the skin bends and can make future conservation difficult.
For display, support the entire hide on an acid-free or archival-quality backing rather than hanging it from one end. Keep it away from direct sunlight, damp walls, fireplaces, and heating vents. UV exposure can fade the pattern, while repeated swings in humidity encourage curling and deterioration.
For a wallet, belt, sheath, or similar project, snakeskin is usually used as a decorative overlay on a stronger leather base. Make a small adhesive test first and stitch through supported material rather than expecting the thin reptile skin to carry the load by itself. Keep scraps and project offcuts with the documentation showing the skin’s legal origin.
Frequently Asked Questions
How do you tan a rattlesnake skin at home?
Start with a legally obtained, head-free skin, then flesh it completely and use a reptile-specific tanning system according to its label. Oil and gently work the hide as it dries if you want a flexible craft material. Do not combine timing, ratios, or chemicals from different tanning recipes.
How do you tan a snake hide without a tanning kit?
An alcohol-glycerin treatment can preserve a clean, fleshed skin for decorative display, but it should not be assumed to produce the same durable leather as a true tan. Salt or borax alone mainly removes moisture and may leave the hide stiff. For a valuable skin or working leather, professional tanning is safer than an improvised recipe.
Does borax tan a rattlesnake skin?
Borax can help dry and preserve a raw skin, but it is not a complete tanning process by itself. A borax-cured hide may become stiff or brittle and can respond poorly to moisture. Use it only as part of a tested process rather than as a substitute for reptile tanning chemistry.
Is a rattlesnake tanning kit worth using?
A rattlesnake tanning kit is usually the easiest choice for a beginner who wants consistent craft leather. A complete kit reduces guesswork because its cleaning, tanning, oiling, pH, and timing instructions are designed to work together. Read the label and safety data sheet before buying so you know what extra protective equipment and supplies are required.
How long should a rattlesnake skin soak?
There is no universal soak time. Commercial directions can differ by many hours because formulas and application methods are not interchangeable. Follow the exact product instructions and avoid extending the soak, which may damage the scale layer or encourage spoilage.
Can you tan a rattlesnake skin with salt only?
Salt can cure a skin by drawing out water, but a salt-dried hide is not the same as tanned leather. It will usually be firmer and more vulnerable when re-wetted. Use salt for temporary stabilization only when the selected tanning process calls for it.
Is it legal to keep a rattlesnake skin?
It depends on the species, where and how the animal was obtained, and the rules governing possession and wildlife parts in that jurisdiction. Check the current regulations with the relevant state wildlife agency before taking, transporting, buying, selling, or keeping the skin. Save permits, tags, receipts, and transfer records with the finished piece.
Conclusion
The most reliable answer to how to tan a rattlesnake skin is to begin with a legal, head-free hide, flesh it meticulously, and use one complete reptile-tanning system from start to finish. Salt and borax are useful curing materials, while alcohol and glycerin are better reserved for low-wear display preservation. Neither should be confused automatically with durable leather tanning.
Take the safety and legal checks as seriously as the craft itself. If the hide is attached to any part of the carcass, shows spoilage, comes from an uncertain source, or is too valuable to risk, contact a licensed wildlife professional or reptile-experienced tannery before proceeding. For more practical, carefully researched guides, explore the latest articles on StoryPrior.